 » Mama Rita\'s Peach Cobbler')" height="19" width="254">
To prepare:
Sift together dry ingredients, excluding almonds. Cut in butter until you have coarse crumbs. Combine milk and egg and then add to dry mixture, stirring just until moistened.
Combine cornstarch, cinnamon, brown sugar and water in saucepan and cook until thickened. Add the sliced peaches, lemon juice, and butter. Cook about five to ten minutes, until peaches are hot and juice is bubbling. Pour into an 8-inch (approximately) round or square baking dish. Spoon biscuit topping over the peaches in about 6 biscuits/mounds (don’t panic- they will not cover the peach mixture, but will grow in the oven). Scatter topping with sliced almonds. Bake at 400F (205C) for 20 to 25 minutes, until golden. Serve hot out of the oven with a scoop of vanilla bean ice cream.
Mama Rita's Peach Cobbler
Ingredients (serves 4-6):Peach filling:
1 and 1/2 teaspoons cornstarch
1/4 tsp cinnamon
1/3 cup/~70g brown sugar
1/2 cup/125ml water
5-6 cups sliced, peeled peaches (~5-6 medium peaches)
1 tbsp fresh lemon juice
1 tbsp/10-15g butter
.
Biscuit topping:
1 cup/130g flour
2 tbsp/~25g sugar
1 and 1/2 tsp baking powder
1/4 tsp salt
1/4 cup/50g butter
1/4 cup/50ml milk
1 egg, slightly beaten
small handful (~30g) of thinly sliced almonds (reserve to top before baking)
to serve: preferably hot from the oven with vanilla ice cream
 » Blueberry Buttermilk Panna Cotta')" height="24" width="309">
Heat the cream, add the sugar and a lengthwise sliced vanilla bean (and the scraped out vanilla seeds). Let it lightly cook for about 15 minutes and stir every now and then. Remove the vanilla pod from the pot and the pot from the heat.
Meanwhile soak the sheets of gelatin in some water (for about 10 min). Squeeze well. Add them to the cream mixture and stir thoroughly until the gelatin has completely dissolved.
Put the blueberries together with the buttermilk in a blender, mix until you get a smooth puree, then pour the mixture through a fine sieve into a bowl. Finally add the puree to the cream, stir well and divide up the cream-fruit-mix into four molds. Chill for at least 8 hours, better over night.
To unmold the panna cotta, briefly dip the form in hot water and carefully flip it over on a plate. Decorate either with melted white chocolate or some chocolate flakes (scrapped from a bar of chocolate) - we found the chocolate to be the perfect companion.

Blueberry Buttermilk Panna Cotta
Prep time: about 25 min., chilling: at least 8 hours
Ingredients (serves 4):
200 ml cream
4 tsp sugar
1 vanilla bean
100 ml buttermilk
150g blueberries
2 sheets gelatine
for decoration: white chocolate

Basic Panna Cotta with fruit variation
Prep time: about 20 min., chilling: best over night
Ingredients (serves 4):
400 ml cream
2-3 tsp sugar (depending on the sweetness of the added fruit puree)
1 vanilla bean
2-3 sheets gelatine (I prefer less - for smoother results)
50-100g fruit puree (trial and error works best, also depends on the used fruits)
physalis/chocolate for decoration
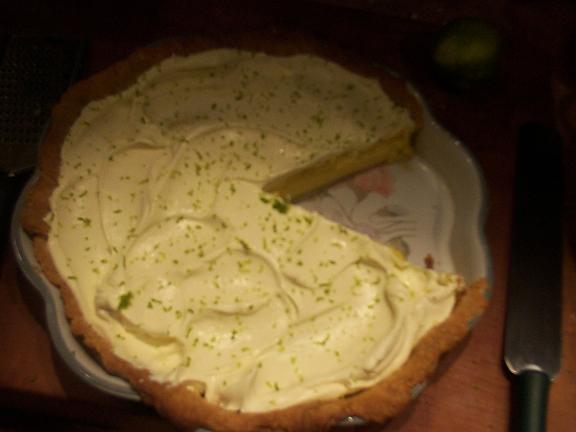 KEY LIME PIE
Ingredients:
9” Shortcrust Pie Crust, fully baked, using 110g flour, 55g Butter, pinch salt – See My Shortcrust Recipe OR make a Digestive Biscuit Base using this Cheesecake Recipe instead.
1 400g Tin Condensed Milk (they actually come in 397g I believe but it’s the same thing)
4 Egg Yolks (freeze the egg whites if you’re feeling frugal)
150ml Freshly Squeezed Lime Juice (this constitutes about 5 limes. To get the maximum juice from them, roll them firmly against a work surface to break down the segments).
Zest of one Lime (I use a Micro Planer)
METHOD:
Preheat the oven to 180c.
Whisk together the egg yolks and condensed milk until smooth. Slowly pour in the lime juice, stirring all the time. The mixture will tighten up because of the acidy limes reacting with the eggs and condensed milk so do it carefully (Note: back in the olden days, the pie wouldn’t even be cooked, the cook would rely on this chemical reaction to make the filling naturally thick, obviously today people are squiffy about eggs so prefer to cook it to a Quiche-like consistency). Stir until smooth, then whisk in the zest.
Pour into the pour crust.
Bake for about 20 minutes or until it is wobblingly set.
Leave to cool on a wire rack then refrigerate for at least 2 hours (although we could only manage one!). If you like, cover with a 284ml carton of double cream, whipped together with a tablespoon caster sugar (this stabilises the cream and stops it spoiling quickly – in fact, ours was still good two days later) and decorate with some lime zest.
Or, simply dust with some icing sugar and serve with pouring cream.
HONEY AND GOATS YOGHURT PANNA
 COTTA - Serves 4 (but keeps in the fridge for a couple of days if there's just the two of you - and that is the whole point)
Ingredients:
280ml Double Cream
100ml Milk
1 Sachet Powdered Gelatine (use leaf if you can work out how on earth it works)
2 Tbsp Vanilla Caster Sugar
1 1/2 Teaspoon Honey or to taste
150ml Goats Yoghurt or regular Plain Yoghurt of your choice
METHOD:
In a small saucepan, heat together the milk and cream, letting it simmer for 5-6 minutes.
Meanwhile, if you are using leaf gelatine, prepare it as per the packet. When you add it to the final mixture, make sure to squeeze out any excess water.
Remove the milk/cream mixture from the heat. If you are using powdered gelatine, stir into the milk/cream mixture and stir briskly until dissolved.
Stir in the Vanilla Sugar (or use a drop or two of Vanilla Extract), mixing until dissolved.
Fold in the yoghurt and then honey to taste.
Strain into a jug and pour into small, smooth moulds. I used tiny pudding moulds, Nigel Slater suggests shallow coffee cups.
Leave to cool, then cover with clingfilm and refrigerate until set, a couple of hours.
To turn out, gently work round the edge with a palate knife and plunge into hot water upto the brim for 3-4 seconds. You will hear a slight noise that indicates that it has started to come away from the mould. Turn out onto a plate and serve with figs or any other fresh fruit. Drizzle with more honey.
Serve with only one spoon...
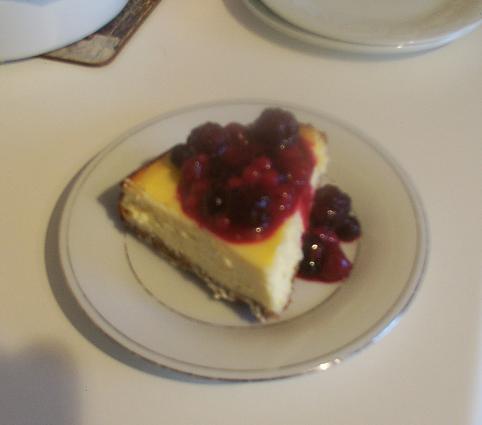
CHEESECAKE
Ingredients: Serves 6 generously
For The Base
100g butter
200g digestive biscuits, crushed
2 tablespoons caster sugar
For the cheesecake itself:
500g Cream Cheese (must be full fat)
200g Caster Sugar
3 medium Eggs
2 Tblsp Cornflour
300ml creme fraiche
Zest and juice of 1 lemon
METHOD:
Firstly, make the base. Gently melt the butter in a saucepan. Add the bashed up digestive biscuits (always a rewarding job, bashing things up, particularly if you’ve had a bad day) and the sugar. Stir until well coated. Remove from the heat.
Lightly oil a 20cm Springform Tin. Pour in the buttery digestive mixture and press down firmly with the bottom of a spoon.
Preheat the oven to 150c oven.
Beat together the cream cheese and the sugar until smooth and glossy.
Add, one at a time, the eggs, beating well until fully amalgamated.
Finally, whisk in the creme fraiche, lemon zest and juice and cornflour until smooth and lump free.
Pour the primrose coloured mixture onto your digestive base and carefully place in the oven. Cook for between 45 minutes to 1 hour. Once cooked, it will still be pale and have a slight wobble to it. Turn off the oven but leave the cheesecake in the oven until completely cooled. Don’t do as I did – look at it after 45 minutes and think it’s still uncooked. It isn’t. The mixture is still very glossy, even when cooked, so it resembles liquid. I left it for another 7 or 8 minutes by which time it had cracked slightly. Also, don’t think about removing it from the oven until cold. I did and the small cracks became quite large craters. The warm cheesecake doesn’t respond well to the instantaneous temperature difference you see. They don’t tell you that in the cookbooks. Most books make some vague comment about leaving it to cool but allude it to tradition. It’s not. There is a scientific basis behind it that is founded in the final aesthetics of the dish. Not to worry though if it does crack. It still tastes wonderful and you can always drizzle the compote artistically over the cracks so no one will ever know except you.
The compote is simply made by crushing some berries (in this case raspberries) with a little caster sugar, then sieving. Stir in some whole fruits and chill.
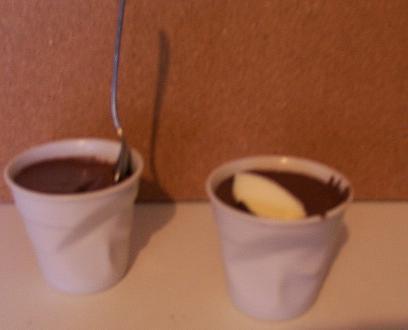
CHOCOLATE MOUSSE WITH CARDOMOM AND CHOCOLATE LIQUEUR
130g plain chocolate (see note above)
You will also need four or five ramekins or little espresso cups.
METHOD:
Melt the chocolate in a bowl over a pan of lightly simmering water. Add the coffee and liqueur. Do not let it get to hot otherwise it will seize up. If this does happen, don’t panic, remove from the heat, add a couple of drops of milk and beat like mad. It will come back again. Leave to cool.
Whilst the chocolate is melting, whisk the egg whites in a bowl until softly peaking. Add the caster sugar and continue to whisk until it has stiff peaks. I highly recommend using an electric hand whisk. Less arm power than a manual whisk, less washing up than a Kitchenaid.
Once the chocolate has cooled a little, beat in the egg yolks, one at a time.
Gently fold in, using a metal spoon, the egg whites into the melted chocolate, a few tablespoons at a time until the two mixtures are completely mixed together.
Spoon delicately into your ramekins and chill for at least an hour. Overnight is best of all. Serve with a dollop of creme fraiche, the sourness of which perfectly counters the rich mousse.
Không có nhận xét nào:
Đăng nhận xét